-

- News
- Books
Featured Books
- smt007 Magazine
Latest Issues
Current Issue
Intelligent Test and Inspection
Are you ready to explore the cutting-edge advancements shaping the electronics manufacturing industry? The May 2025 issue of SMT007 Magazine is packed with insights, innovations, and expert perspectives that you won’t want to miss.

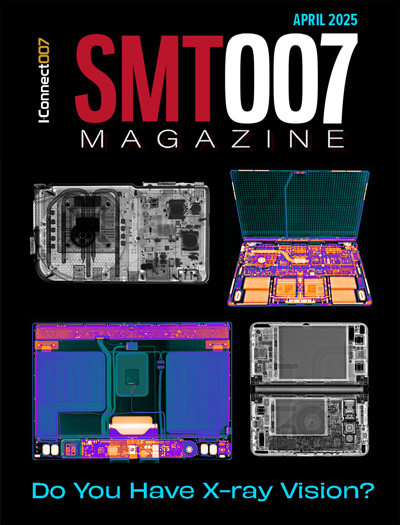
Do You Have X-ray Vision?
Has X-ray’s time finally come in electronics manufacturing? Join us in this issue of SMT007 Magazine, where we answer this question and others to bring more efficiency to your bottom line.

IPC APEX EXPO 2025: A Preview
It’s that time again. If you’re going to Anaheim for IPC APEX EXPO 2025, we’ll see you there. In the meantime, consider this issue of SMT007 Magazine to be your golden ticket to planning the show.
- Articles
- Columns
Search Console
- Links
- Media kit
||| MENU - smt007 Magazine
Preventive Maintenance for ATE Fixtures
December 31, 1969 |Estimated reading time: 6 minutes
This article describes one company`s technique performed as preventive probe maintenance (e.g., replacement of degraded probes) of HP3070 automated test equipment (ATE) fixtures. The general concept can be applied to other ATE systems/fixtures, as well.
Steve Brenne
In a pristine, controlled environment, a probe could last for one million cycles before failure. However, there are a number of factors that contribute to probe degradation when used in a manufacturing environment. Typically, this degradation is seen as an increase in resistance of either the probe or the contact between the probe and the board under test. Probe degradation may be caused by several factors:
Contamination. Dust, flux and other contamination might degrade the probe. This contamination can either affect the internals of the probe or the probe tip.
Probe wear. Side forces affecting the probe during its travel can cause uneven wear that could eventually deform the probe; this results in a friction force that reduces the working force of the probe. With less working force, the probe will not be as effective in penetrating through oxide layers on printed circuit board (PCB) test points.
Reasons for Performing Maintenance
The main reason for fixture maintenance or probe replacement is to maximize test process productivity. As probes begin to degrade, the rate of false test failures will increase, and time will be spent retesting the failing boards, debugging the failures, or debugging the fixture or tests. In some cases, the tolerance of a test is adjusted to the point that the test effectiveness is reduced. In other cases, a test might become disabled if it is not immediately clear that the failure was caused by contact problems resulting from degraded probes. Spending time performing a controlled maintenance on the fixture (Figure 1) can result in an overall increase of productivity and result in higher quality tests.
Fixture Maintenance Methods
One fixture maintenance method is to replace all of the probes in the fixture after a certain cycle count has been reached. While this is an effective means of maintenance, it has some disadvantages. All probes do not degrade at the same rate. When changing all probes in a fixture at the same time, there will inevitably be many probes that are replaced prematurely. On the other hand, there will be probes that should have been replaced long before the maintenance cycle came up. In some cases, the probes that fail prematurely will cause false failures during testing.
Another method of fixture maintenance is waiting until it breaks and then fixing it. Maintaining a fixture based on its cycle count is only practical for high-volume manufacturing. In a low-volume manufacturing environment, a fixture may not have enough volume run across it to justify setting up maintenance based on cycle count. In this case, other factors, such as probe contamination, may have more of an impact on probe life. In this environment, fixture maintenance may become a daily battle of getting boards to pass that, over time, could result in lower quality tests.
Fixture Maintenance
RadiSys has developed a method to deal with the problem of fixture maintenance in a low-volume, high-mix environment. This method is also beneficial to a high-volume, low-mix environment through the reduction of fixture maintenance costs. The company has developed a unique test for each fixture that will report probes that are measuring above a specified resistance threshold. This turns the task of fixture maintenance into a controlled process. When a probe fails, the location of the failing probe, along with a reference to the test-head interface pin, is reported, making it a simple matter of resolving the problem.
The preventive maintenance test involves the use of a shorting plate. The resistance between various probes is measured with simple resistor tests. Three probe sets in the fixture that are wired to each module are designated as common probes, and selected to be on different channels to avoid multiplexing conflicts. The individual resistance of each probe plus the wiring resistance is calculated by measuring resistance between common probes and solving the simultaneous equations. The rest of the probes wired to a particular module are tested with a resistor test using the particular probe in combination with one of the common probes, depending on the multiplexing. The common probe resistance is subtracted from the measured value to obtain the approximate value of the probe resistance. If the calculated value is higher than a specified threshold, the part fails and an error message is printed with the failing information. Using software that automates the process of generating a preventive maintenance test is key to this method. The software developed by RadiSys takes fixturing files as input and produces all necessary files for this test. Another key to the success of this maintenance method is obtaining high-quality shorting plates. Solder-plated copper-clad boards are currently being used. It is expected that these will wear out over time and will need to be replaced. After repeated fixture cycling, the probes will penetrate through the copper cladding into the PCB, resulting in poor contact. There are many options that can be explored in selecting the best material for use in shorting plates. Some items to consider are cost, conductivity and reliability.
Fixturing Resistance Modeling
There are many factors that combine in the overall resistance between the board under test and the test-head circuitry. These are:
- Rft: Resistance between the fixture and the test head. The contact resistance between the test-head "mint" pins and the fixture "personality" pins, and the resistance through the mint pin, affects the resistance between the fixture and the test head. The test-head mint pin is a large, waffle-type pin that can collect contamination causing contact problems. Additionally, because of the nature of the airflow through the 3070 test head, contamination may build up within the test-head mint pin.
- Rw: Resistance of the wiring within the fixture. This is affected by the length and size of the wire and by the quality of the wire wrap connection.
- Rp: Internal resistance of the probe.
- Rpb: Contact resistance between the probe and the board under test.
- Rb: Resistance between probes on the shorting plate. This is related to the separation of the probes and the quality of the shorting plate.
For example, Figure 2 puts the fixture maintenance process into proper perspective. The figure has been simplified, lumping all factors in the board to test-head resistance into one element. With all other factors negligible, this assumes that the probe resistance and probe contact resistance contribute the most to overall resistance. It is not possible to isolate the individual items that contribute to the overall resistance.
Figure 3 shows a simplified model of the fixture resistance. This is the model that is used to determine the resistance of the common probes. Once the resistance of the common probe is known, the resistance of the other probes can be estimated by subtracting the resistance of the common probe from the resistance seen between the combination of a common probe and the probe under test.
In addition to using this method for performing maintenance of fixtures, the company is planning to use a similar technique to verify the HP3070 test-head mint pins. This would involve a specific fixture, which would be nothing more than a shorting plate attached to a frame, and a test to check each of the resource pins on the test head.
STEVE BRENNE is a test engineer at RadiSys Corp., 5445 NE Dawson Creek Drive, Hillsboro, OR 97124; (503) 615-1392; Fax: (503) 615-1115; E-mail: Steve.Brenne@radisys.com.


