-

- News
- Books
Featured Books
- pcb007 Magazine
Latest Issues
Current Issue
The Legislative Outlook: Helping or Hurting?
This month, we examine the rules and laws shaping the current global business landscape and how these factors may open some doors but may also complicate business operations, making profitability more challenging.

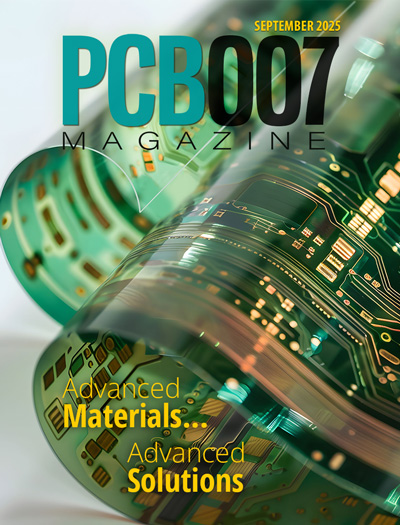
Advancing the Advanced Materials Discussion
Moore’s Law is no more, and the advanced material solutions to grapple with this reality are surprising, stunning, and perhaps a bit daunting. Buckle up for a dive into advanced materials and a glimpse into the next chapters of electronics manufacturing.

Inventing the Future With SEL
Two years after launching its state-of-the-art PCB facility, SEL shares lessons in vision, execution, and innovation, plus insights from industry icons and technology leaders shaping the future of PCB fabrication.
- Articles
- Columns
- Links
- Media kit
||| MENU - pcb007 Magazine
Estimated reading time: 5 minutes
Connect the Dots: Designing for Reality—The Physical Manufacturing Phases
Designing for reality is focused on the art and science of PCB design and production. If you’re trying to make a PCB that stands out for being reliable, easy to manufacture, and meets all design goals, then you’re in the perfect spot. We’re here to break down the PCB manufacturing process while sharing essential tips for smooth design and production.
Our goal is to show you how to craft PCB designs that are great on paper and in reality. This means considering how your designs will come to life in the manufacturing phase and working closely with your manufacturing partners to understand their specific needs.
In last month’s column, I discussed the importance of choosing the right CAD (computer-aided design) file formats and design for manufacturability (DFM) and looked at the crucial step of CAM (computer-aided manufacturing) tooling. I also touched on how receiving feedback and making design adjustments during CAM can significantly improve your final PCB.
In this installment, we will talk about the first phases of the physical manufacturing process. CAM outputs, imaging processes, and physical materials—this is where PCB design gets messy. Roll up your sleeves, it's time to dig in.
CAM Output: The Blueprint for Manufacturing
We describe the process of transferring the electronic design onto the PCB material as imaging. This step is critical in defining the traces, component pads, and other features on the circuit board that will later be etched to create the actual circuit. Though this process may sound simple, a lot goes into it.
CAM output refers to the set of files and documentation generated from the PCB design. It tells the manufacturer how to produce the PCB. CAM output includes detailed instructions for all physical layers and features of the PCB, such as copper traces, drill holes, solder mask application, and silkscreen (legend) placements.
The CAM tool makes minor adjustments to your design to make manufacturing as reliable as possible. It will not make design-related changes that could change the product's functionality. The designer must clearly designate in the fabrication notes any areas of the design that absolutely cannot be modified.
These CAM outputs communicate the designer's intent to the machinery, operators, and technicians who will bring the PCB to life, ensuring every layer, hole, and label is precisely where it belongs. The clarity, accuracy, and completeness of these outputs dictate how smoothly the transition from design to product goes.
Understanding the Materials
When we discuss the level of difficulty that CAM outputs are meant to address, we are usually concerned with multilayer designs. A multilayer design is more complex than just a double-sided board. First, the internal layers must be created. These layers are manufactured in pairs, two to a board. The boards are copper-clad laminate, which is a rigid epoxy layer clad in copper on both sides.
A polymer film—called photoresist—is applied over the copper on both sides, then the board goes to imaging. An imaging process (described below) transfers the electronic circuit design to the photoresist. Portions of the resist are exposed to light and remain on the panel while the unexposed resist is removed (developed) from the panel. On interior layers, the remaining photoresist protects the desired retained copper, while the rest of the copper is etched away.
Of course, other conductive materials can also be used in the production of circuit boards. Some of them use similar techniques, while others require that a new approach be taken. Tin, silver, and gold can all be used, for instance. Each comes with its own challenges. For example, electrolytic silver can form dendrites over time, which end up creating unexpected shorts in a circuit.
The Imaging Process
Imaging refers to the process of applying the electronic design to the physical manufacturing panel. This process is central to creating the PCB, as it defines the board’s copper layout, such as circuit traces. During imaging, a photosensitive polymer—referred to as a photoresist—is applied to the copper-clad panel. The image is usually transferred to the photoresist in one of two ways: digitally using direct imaging or by plotting a film and exposing the film to UV light.
Direct imaging is a newer process with less tolerance variation built into it than plotting. The image is transferred to the photoresist using a laser, which offers much greater precision. The imaging machine can also calculate stretch and skew that is created during the process, allowing it to make corrections to the data so that finished images can more accurately line up with slight variations in manufacturing panels.
Plotting film on clear Mylar is an older technique that relies heavily on the skill and experience of the operator. For each copper layer, a corresponding film is plotted and used in the imaging process. The films are placed on either side of the panel, and a vacuum is used to ensure tight contact before exposing it to high-intensity UV light. This exposure process alters the photoresist (cross-linking the polymer) through the clear parts of the film, allowing for the development of the panel where the unaltered resist is washed away, leaving the designed pattern intact.
Despite its effectiveness, plotting film can introduce alignment issues similar to those found in direct imaging, requiring manual adjustments by the operator. Given the precision needed, especially for dense images, it’s crucial for designers to assess the expertise of manufacturers using this technique.
You can learn more about imaging processes in my book, The Printed Circuit Designer’s Guide to Designing PCBs for Reality, and in the latest episode of our On the Line With… I-Connect007 podcast.
The Next Step in Manufacturing
With panels prepared and machinery ready, the stage is set for the actual creation of the PCBs. Chemical processes, layer deposition, drilling, routing, and final assembly all hinge on the information encoded in our CAM outputs. Understanding these documents and their significance helps peel back the curtain on the marvel that is PCB manufacturing, offering insight into the complex ballet of technology and expertise that makes our modern electronics possible.
Listen to the podcast episode, where we discuss some of the interesting details of materials, imaging, and manufacturing, along with some real-world problems that we have encountered.
Download The Printed Circuit Designer’s Guide to… Designing for Reality by Matt Stevenson. You can view other titles in the I-007eBooks library.
This column originally appeared in the May 2024 issue of Design007 Magazine.
More Columns from Connect the Dots
Connect the Dots: Evolution of PCB Manufacturing—LaminationConnect the Dots: How to Avoid Five Common Causes of Board Failure
Connect the Dots: Sequential Lamination in HDI PCB Manufacturing
Connect the Dots: The Future of PCB Design and Manufacturing
Connect the Dots: Proactive Controlled Impedance
Connect the Dots: Involving Manufacturers Earlier Prevents Downstream Issues
Connect the Dots: Stop Killing Your Yield—The Hidden Cost of Design Oversights
Connect the Dots: Designing for Reality—Routing, Final Fab, and QC


